-
Automations
-
Integrations
-
Import & Export
-
Privacy and Security
-
Infinity Partner Programs
-
Announcements
Filters
Located on the bar right below your tabs, filters are meant to help you single out and view exactly the items you need at any given moment. That way, you don't have to search through your data every time to find, for example, tasks with a high priority label.

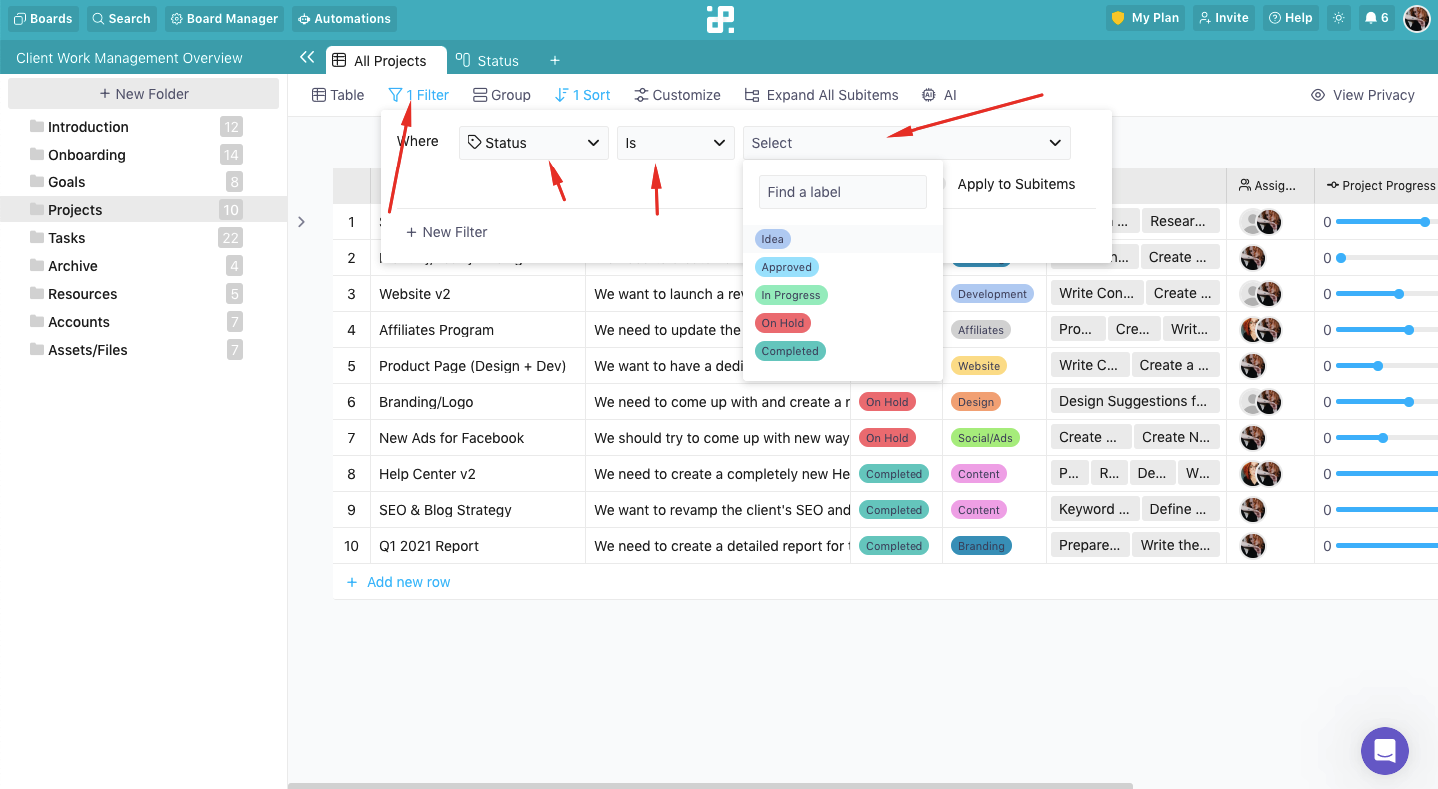
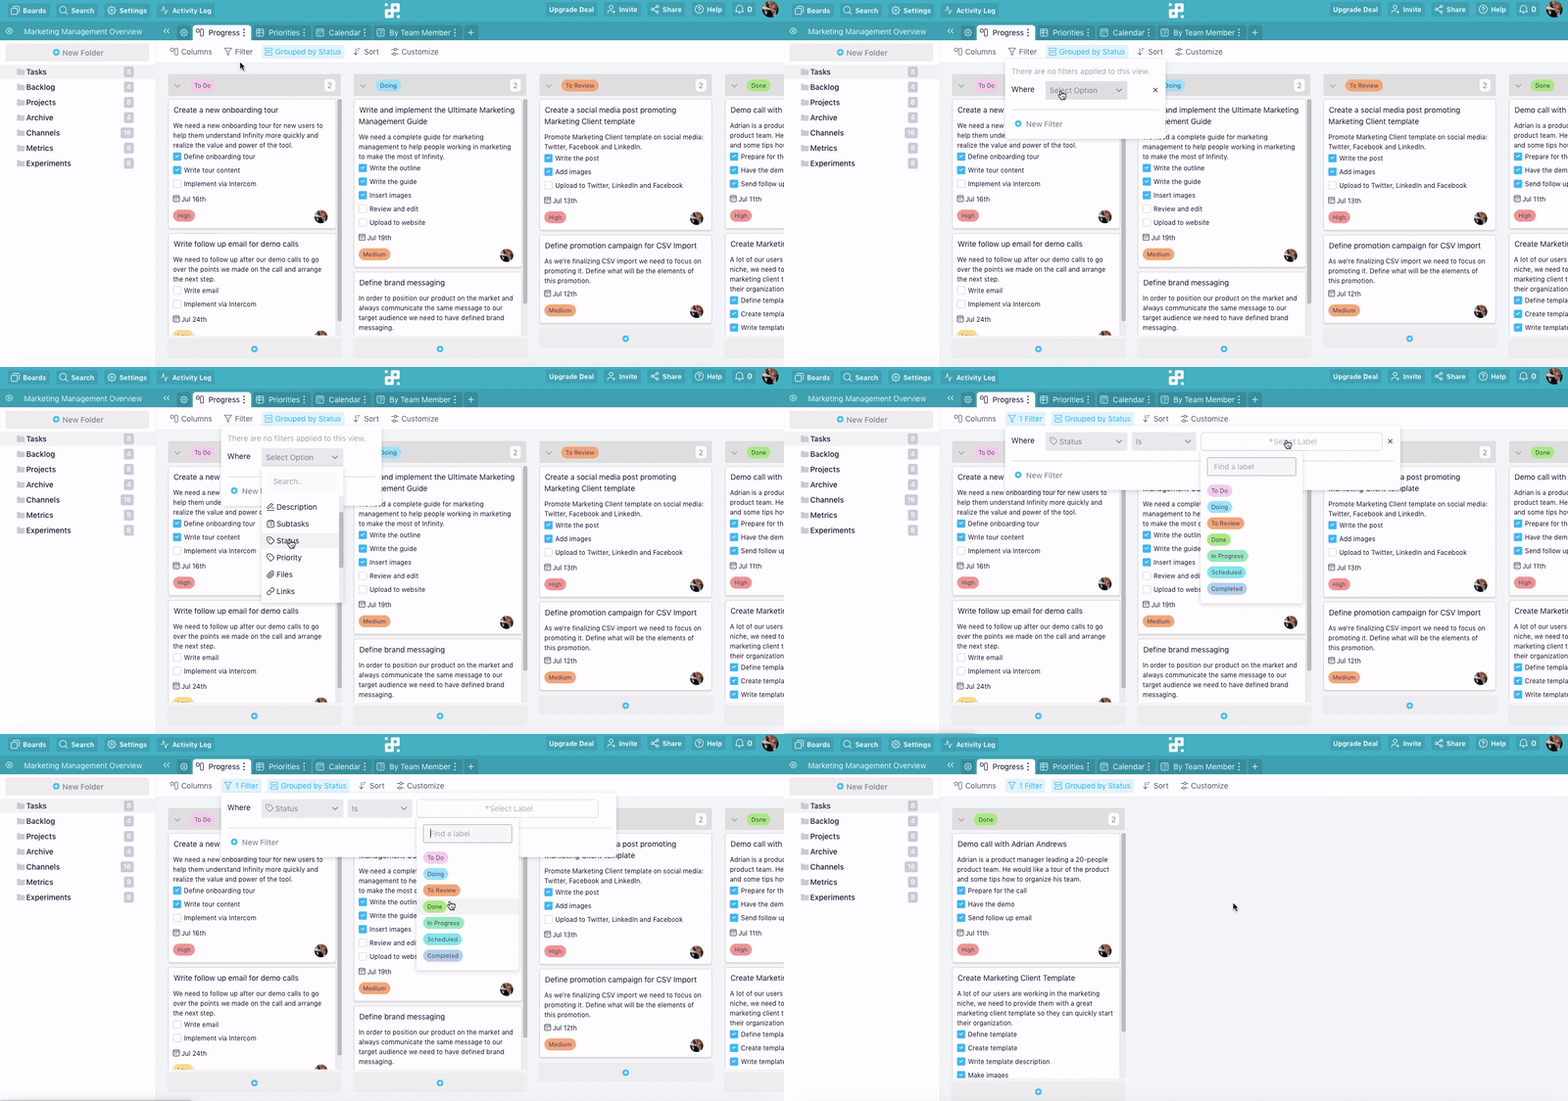
When you click on the Filter button, you will notice it says ‘There are no filters applied to this view’ (if you haven’t created any filters yet).
To create a new filter, click on this same button, then Select Option. From the drop-down menu, choose which attribute you’d like to use to filter your items.
Keep in mind that each attribute will trigger different options.
For example, if you choose a label attribute that you created for Status, you can end up with something similar to: “Where Status Is In Progress” or “Where Status Is All Of To Do”.
In this case, if you select a label from the list e.g. To Do, you'll only see items with that particular label and nothing else.

{primary} NOTE: This GIF was made prior to the changes made in design and featues, but the action (how Filters work) is the same.
As you add more filters they will narrow down the items you’re going to view. To add a new filter, click on the +New Filter below the drop-down menu.
{info} TIP: You can add as many filters as you like to create the best possible view for yourself.
You can also change the values inside the formula to get different results anytime you like.
And if you want to delete a filter, just click the X symbol on the far right of the filter you created.