Boards
{primary} NOTE: 'Archive' was changed to 'Trash' since the making of this video. For more information about this feature, head over to this link.
What Is a Board?
{primary} NOTE: The Board Manager was released in November 2020, and this article was updated around the same time.
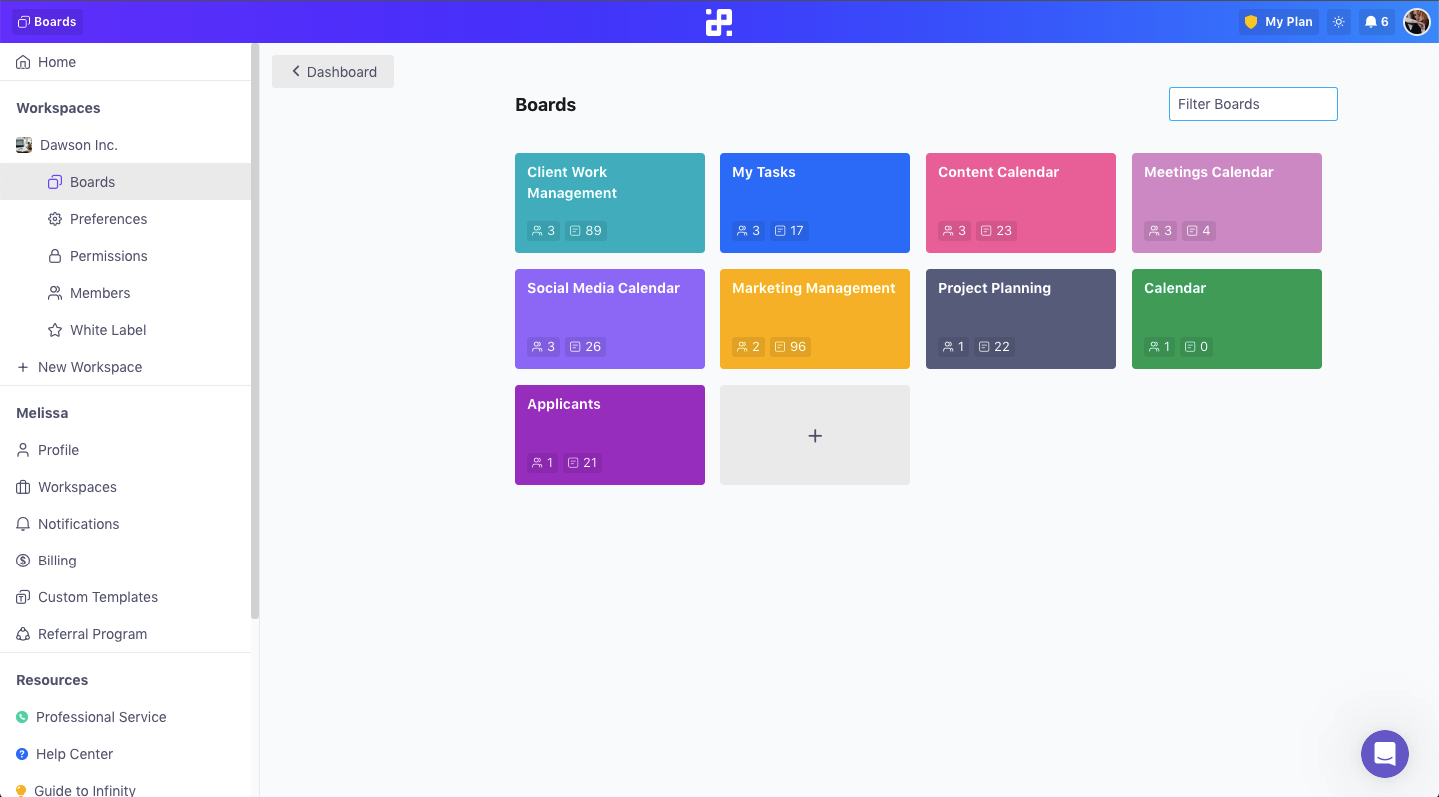
A workspace consists of boards. In Infinity, you can add as many boards to your workspace as you need.
You can use your boards any way you like. For example, if you’re organizing your whole company inside one workspace, your boards can be different departments you want to organize: Marketing, Accounting, Production, HR, etc.
If you’re working with clients, your boards can also represent different clients. They can also stand for various projects you’re working on.
How to Create a New Board
When you sign up and create a workspace in Infinity, you will automatically get a couple of boards with pre-loaded templates. You can choose if you want to explore them a bit or create a new board on your own.
If you decide to create a new board, find the gray rectangular button a plus sign in your workspace and click on it. You will see three options once you do:
- Start from scratch
- Load a template
- Import from Trello
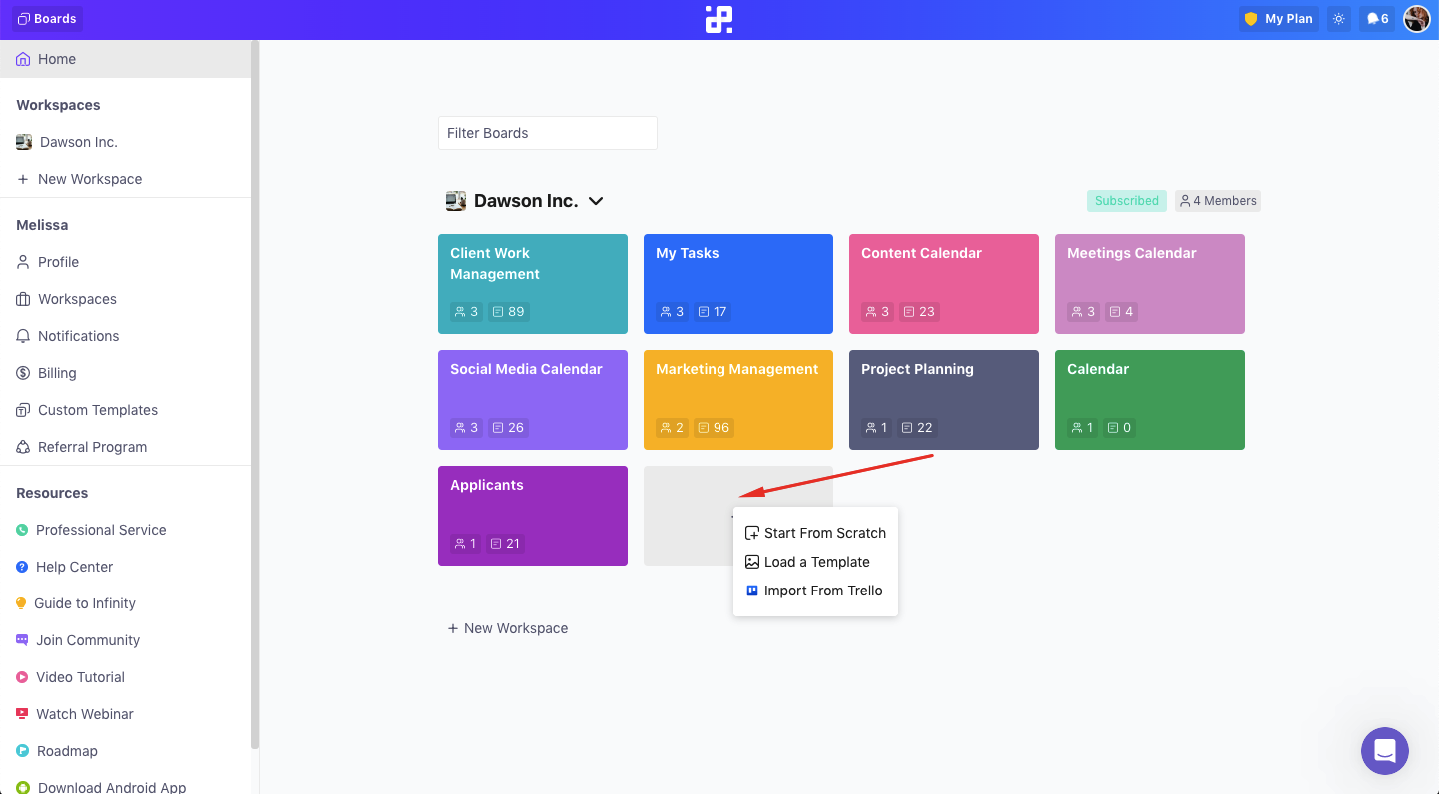
Creating a board from scratch is something we usually recommend to people who have a bit more experience with Infinity and know their way around the app.
Loading one of the templates from our database is a great way to get started if you’re new to Infinity. You can choose the one that’s the closest to what your business is about and tweak it until it fully fits your needs.
The last option—import from Trello—is reserved for Trello users who want to quickly and with ease move their boards to one of Infinity’s workspace.
When you select your option of choice, a new window will open up where you’ll get to customize your board:
- First, give your board a name by typing it in the top field.
- Next, write a description for your board (if needed) and set a theme color.
- Decide which team members from the list you want to add to the board or invite new ones by clicking on the ‘Invite Members’ button.
- Once you’re done, click ‘Continue’.
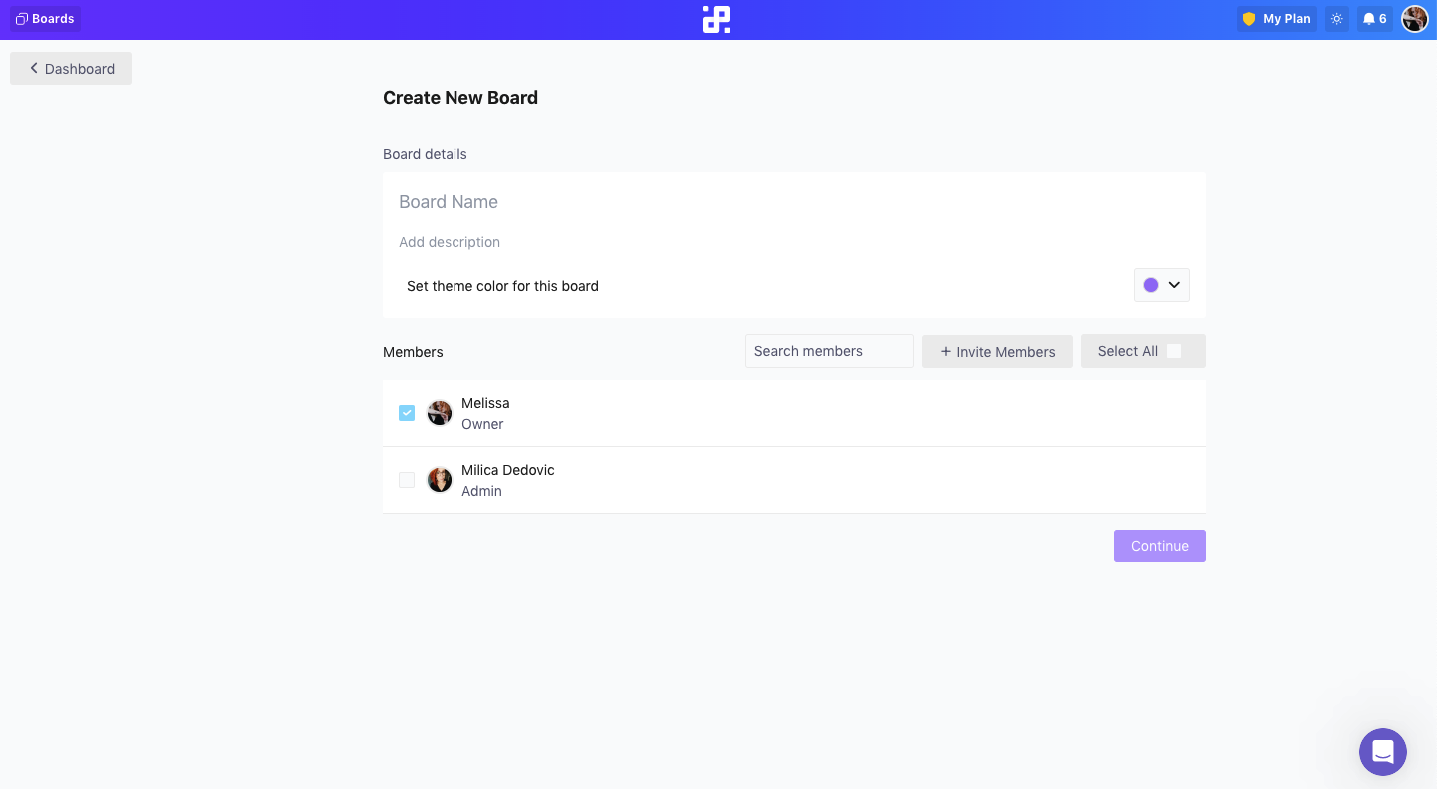
If you choose to create a board from scratch, after setting everything up you will be taken to the inside of your new board.
If you choose to load a template, you will be taken to our page with templates, where you’ll get to pick the design of your new board.
If you opt for Trello import, you will need to authorize Infinity to access your Trello account. Once you do, you’ll be able to import your boards into Infinity.
How to Navigate a Board
Congrats! You’ve created a new board. Now, let’s see what happens inside.
As we already said, you can use a board to store and organize everything related to one company department or one client, if you’re a freelancer. Or, if you’re using it for personal plans, each board can be dedicated to one aspect of your life you want to organize, e.g. diet, workout, studying, etc.
Depending on what you chose, your board will take different shapes. 'Start from scratch' will give you an empty board, a template will give you a predefined set of data and 'Trello import' will give you a board filled with your data from a Trello board you choose.
A board will basically be the hub of all the information, files and processes related to that board. It ultimately consists of items that you can categorize in different folders and manipulate in many different ways.
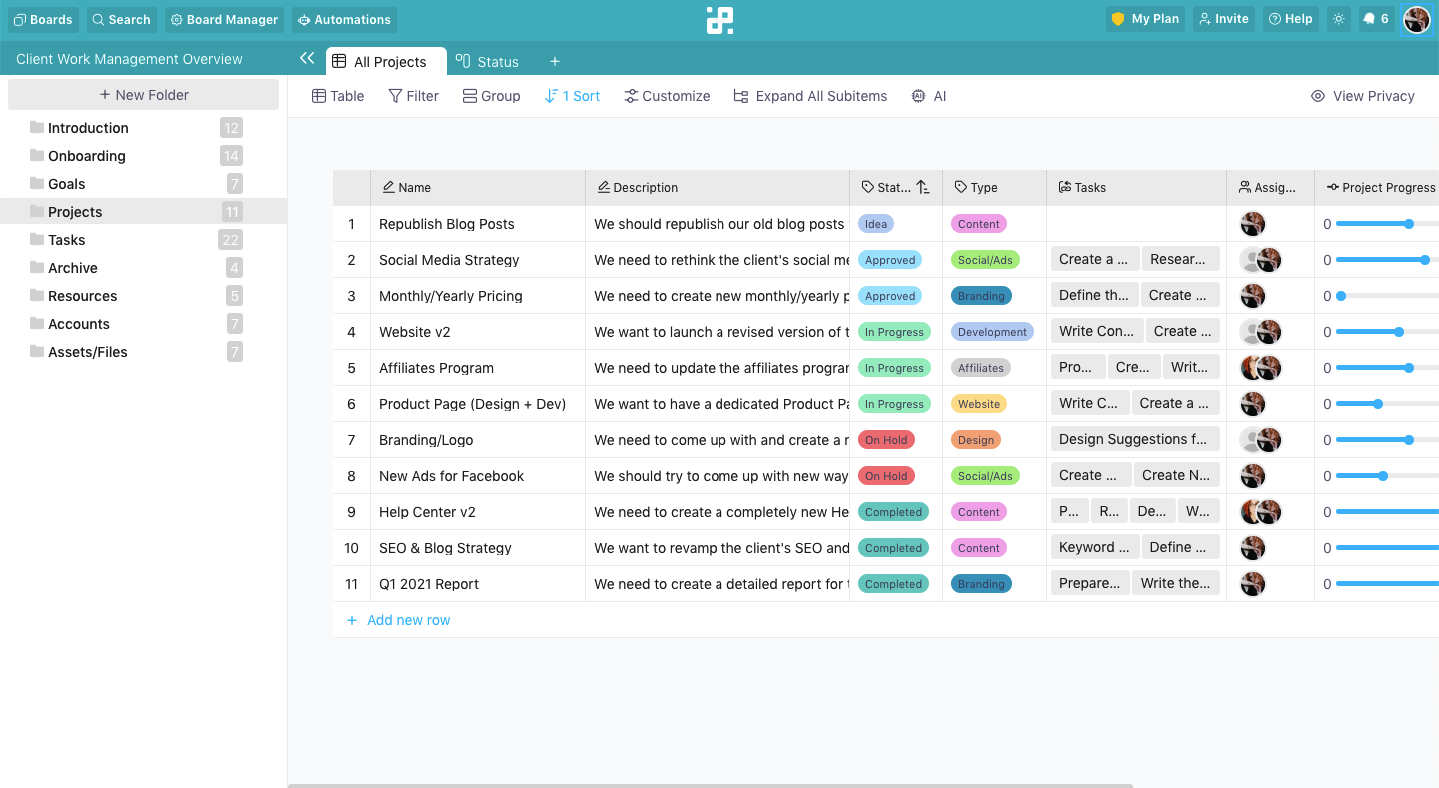
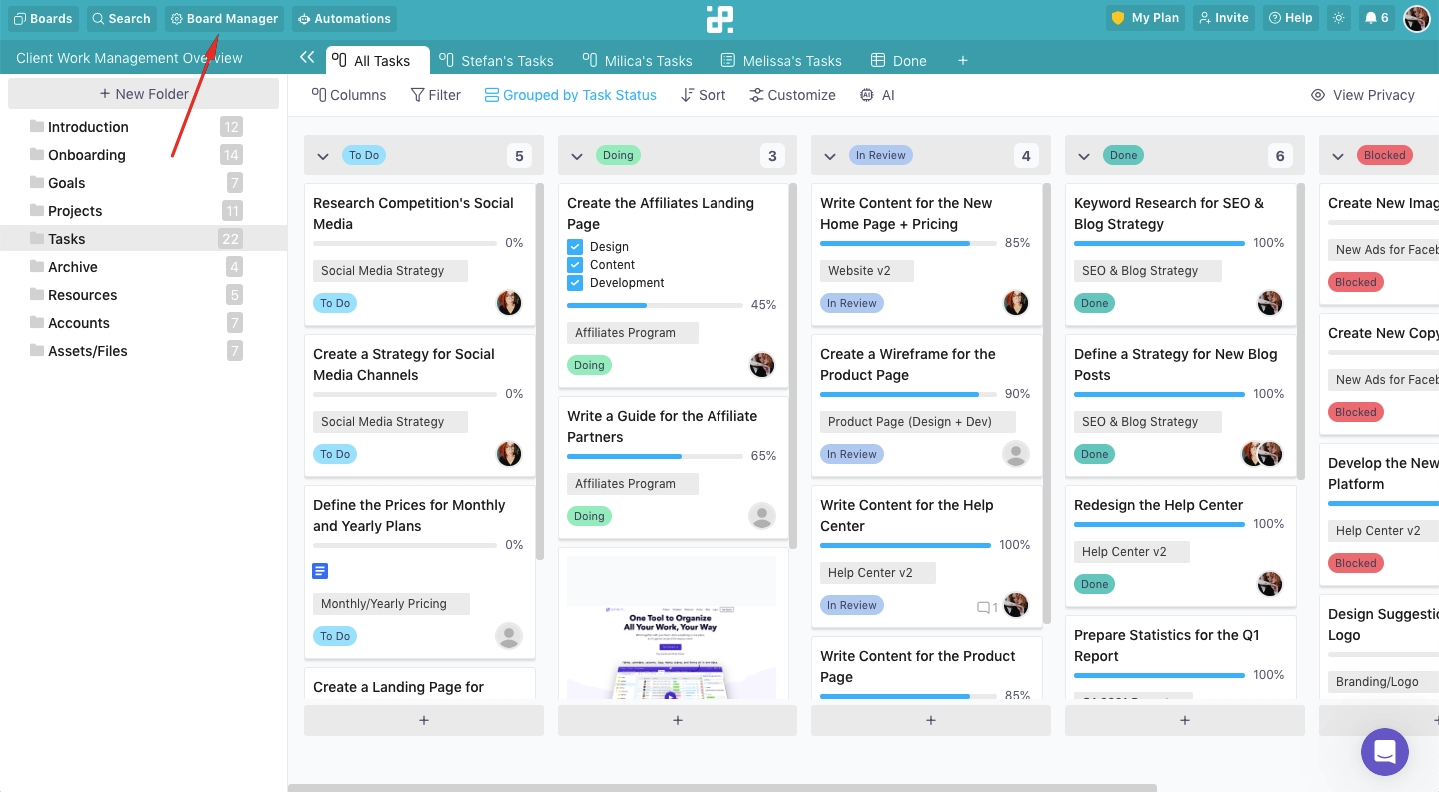
In the board header, you will find several useful buttons for manipulating and navigating your board. Let’s start from left to right.
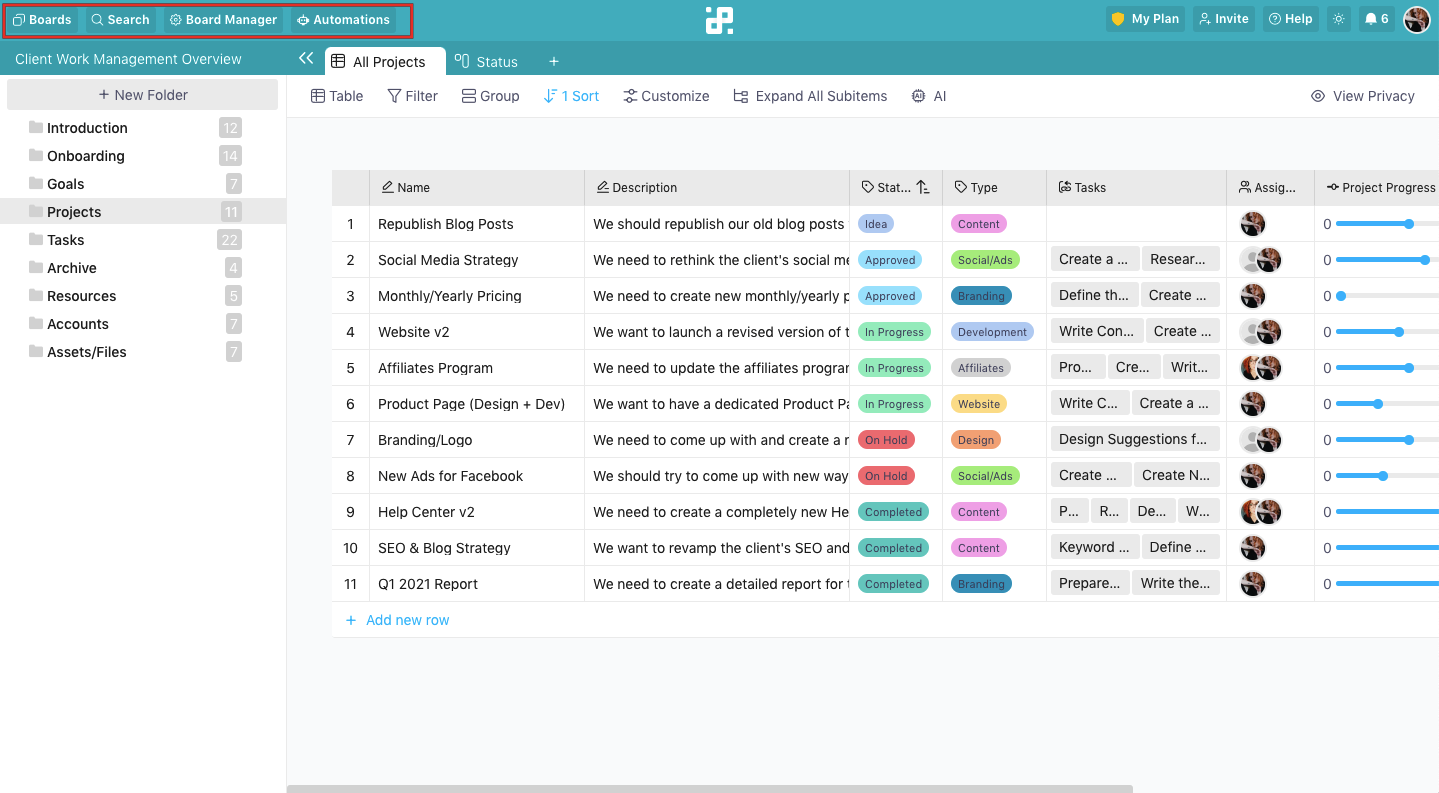
In the top left corner, you will find the Boards button. Clicking this button will give you a list of all the boards in all the workspaces you have, so you can easily switch to another board without having to return to the dashboard.
Next to it, you'll see the Search button, which will help you find any item from the board in a matter of seconds.
Then we have the Board Manager button which we’ll talk about in more detail below.
Finally, we have the Automations button, which allows you to create various automations within the board. For more information about this feature, click here.
Let’s move on to the right side of the board.
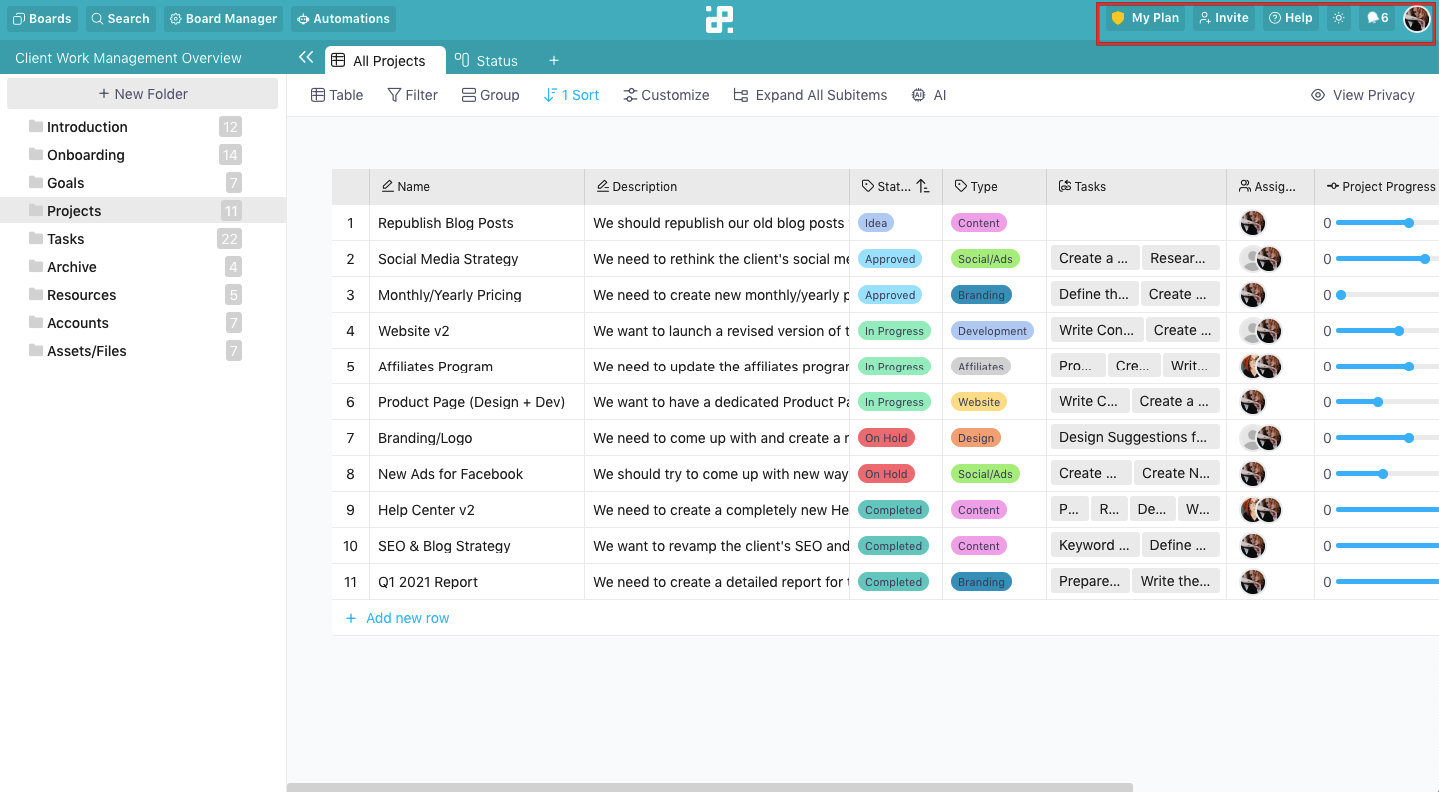
In the top right corner, you will first notice the My Plan button, which will help you keep track of the status of your current plan.
Next to it, you'll see the Invite button. This button will allow you to invite new members to this board directly from the board.
The Help button which offers a couple of options: from scheduling a demo to deleting your demo data. This is also where you can get a quick link to our roadmap.
After the Help button, you will see a small icon shaped like a sun. This is our Dark Mode button which you can use to switch between light and dark mode for your board.
Then we have the Notification icon which will alert you if you have any important notifications. If you click on this icon, you will see a list of all your notifications and you'll be able to change notification settings as well.
On the far right, you will see your profile photo. By clicking on it, you will open up a drop-down menu with various options: changing the settings of your account (My Profile), signing up for our referral program, getting a list of Zapier integrations available for Infinity, hiding the Intercom (chat) window, as well as switching to another workspace.
This is also where you will find the log out button.
And if you want to leave the board and quickly go back to your dashboard, just click the Infinity logo in the center of the board header.
From the dashboard there are several other ways you can manipulate your board. If you click the three dots symbol in the bottom right corner of the board, you will notice these options:
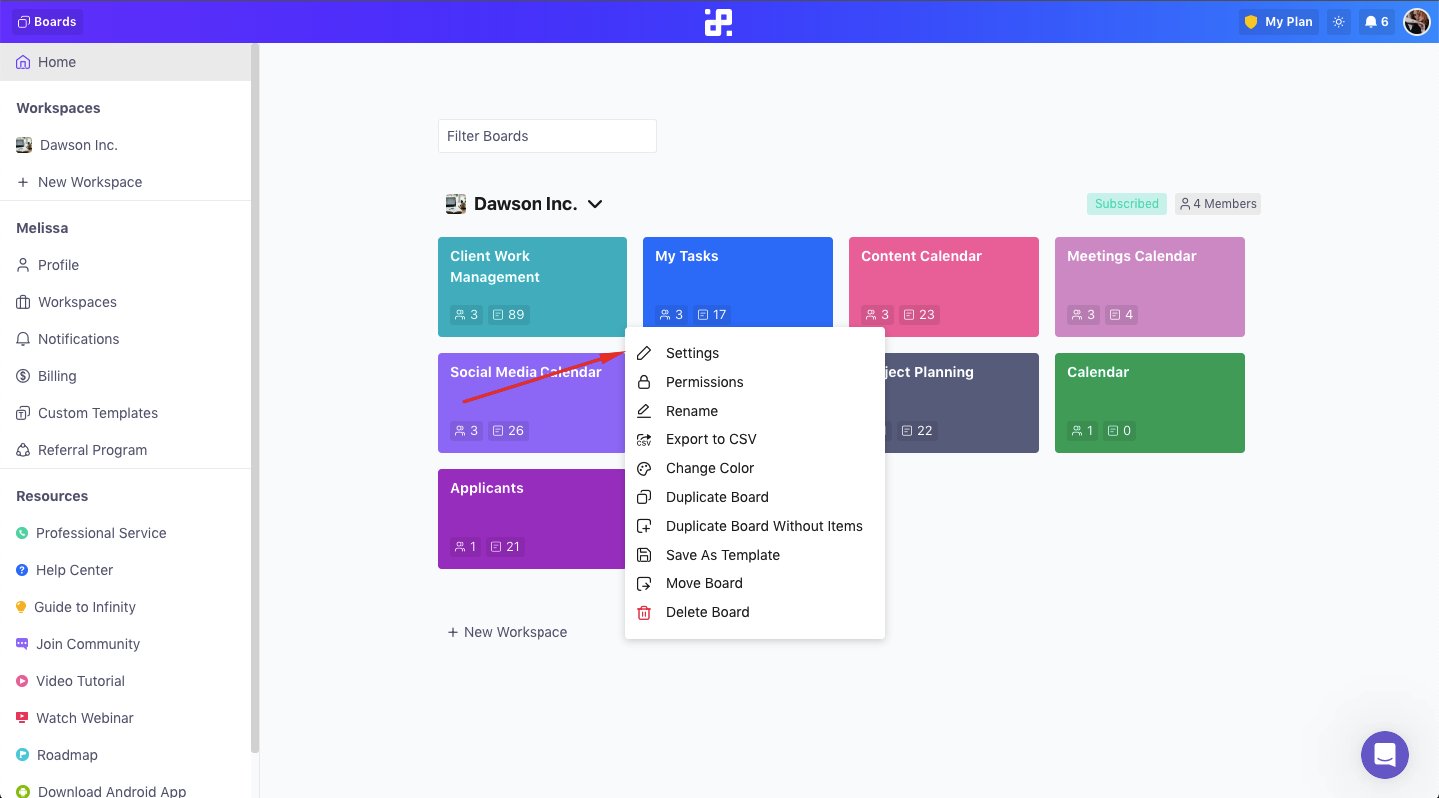
As you can see, this is where you can edit your board, set up permissions (if you are the owner), rename it, export your board data to CSV, change your board's color, save it as a template, duplicate the board, move it to a different workspace and delete it.
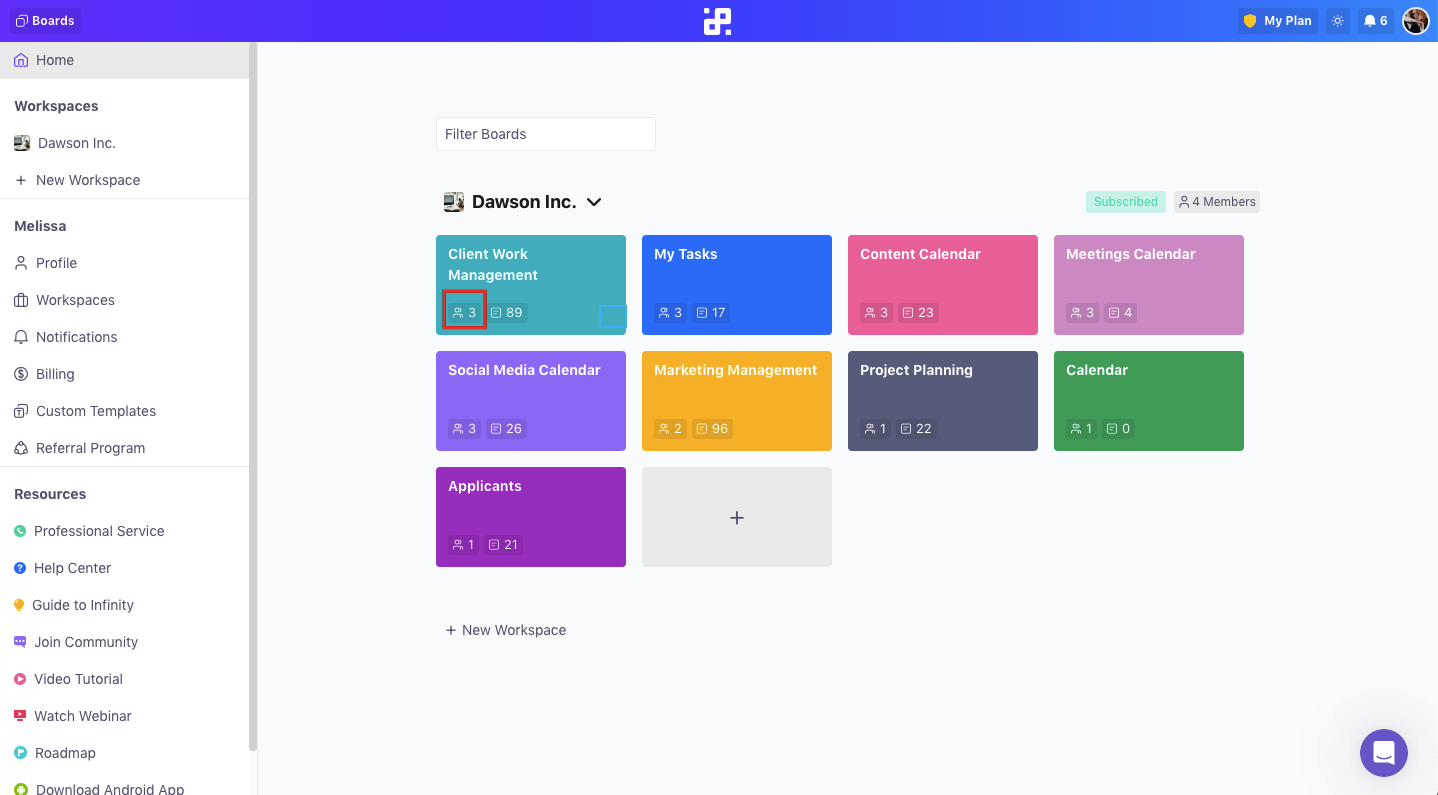
From your dashboard, you can also see how many items a board has and how many members have been added to it.
Using the Board Manager
To access the Board Manager, all you have to do is click on the corresponding button next to the Search button in the upper left corner of your board.
Once you click on this button, a pop-up window will open with a number of different options you can explore.
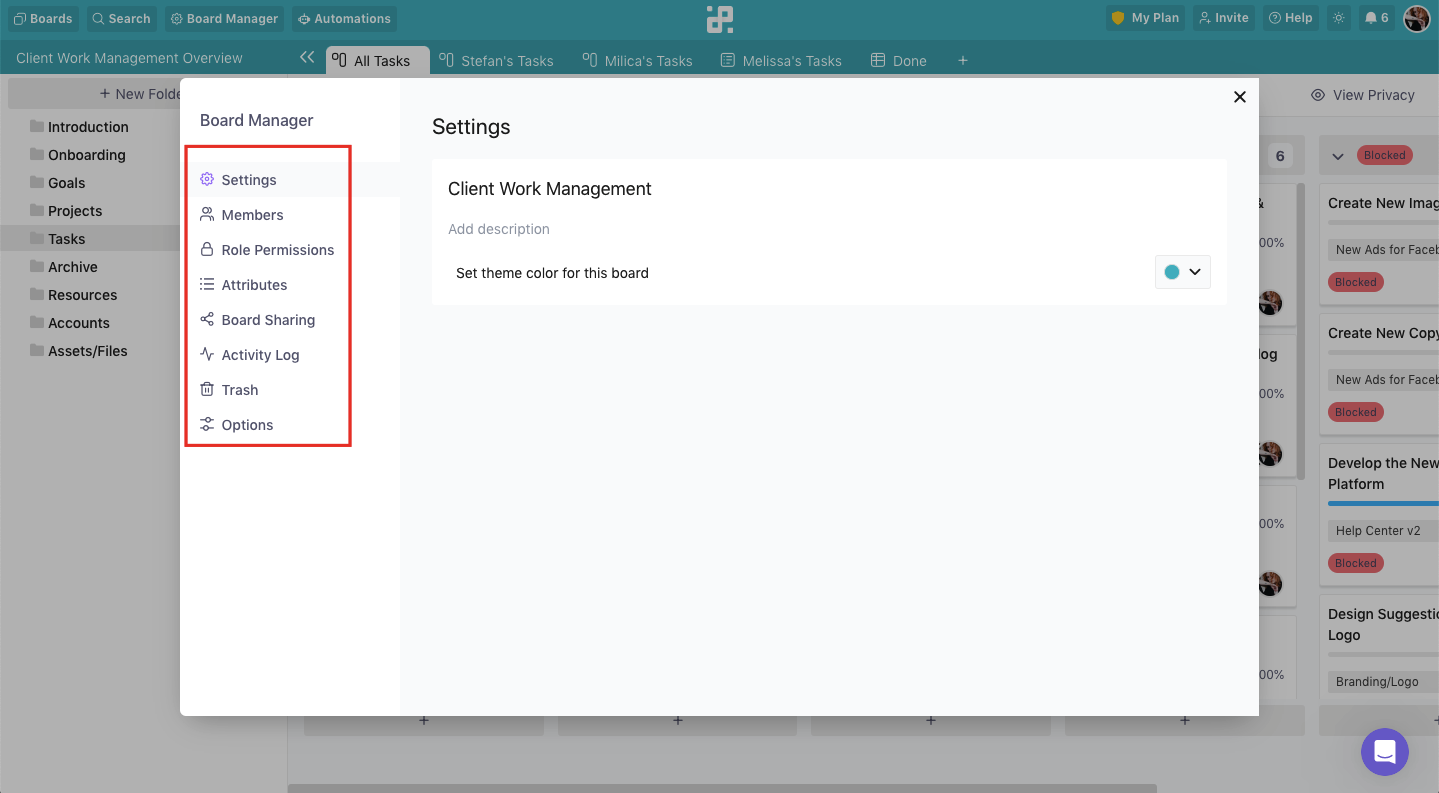
{primary} NOTE: If you're not the owner of the board, you won't see Role Permissions and Board Sharing.
In the Settings section, you’ll be able to easily change the name of your board, add a description for it, and change its color.
In the Members you’ll be able to see and search for your current board members as well as workspace members. By checking the checkboxes on or off, you will be able to remove members from the board or add new members to the board.
You will also be able to invite completely new members to your workspace (and this particular board) if you click the ‘Invite Members’ button at the top of the modal.
By clicking on each member, you'll get an overview of their role in Infinity and all the permissions they have, as well as the folders they're added to.
The Role Permissions section will allow you to change and update board permissions based on different roles (admin, full member, and restricted member). And you will be able to quickly scan which people have which role assigned to them when you click on each role.
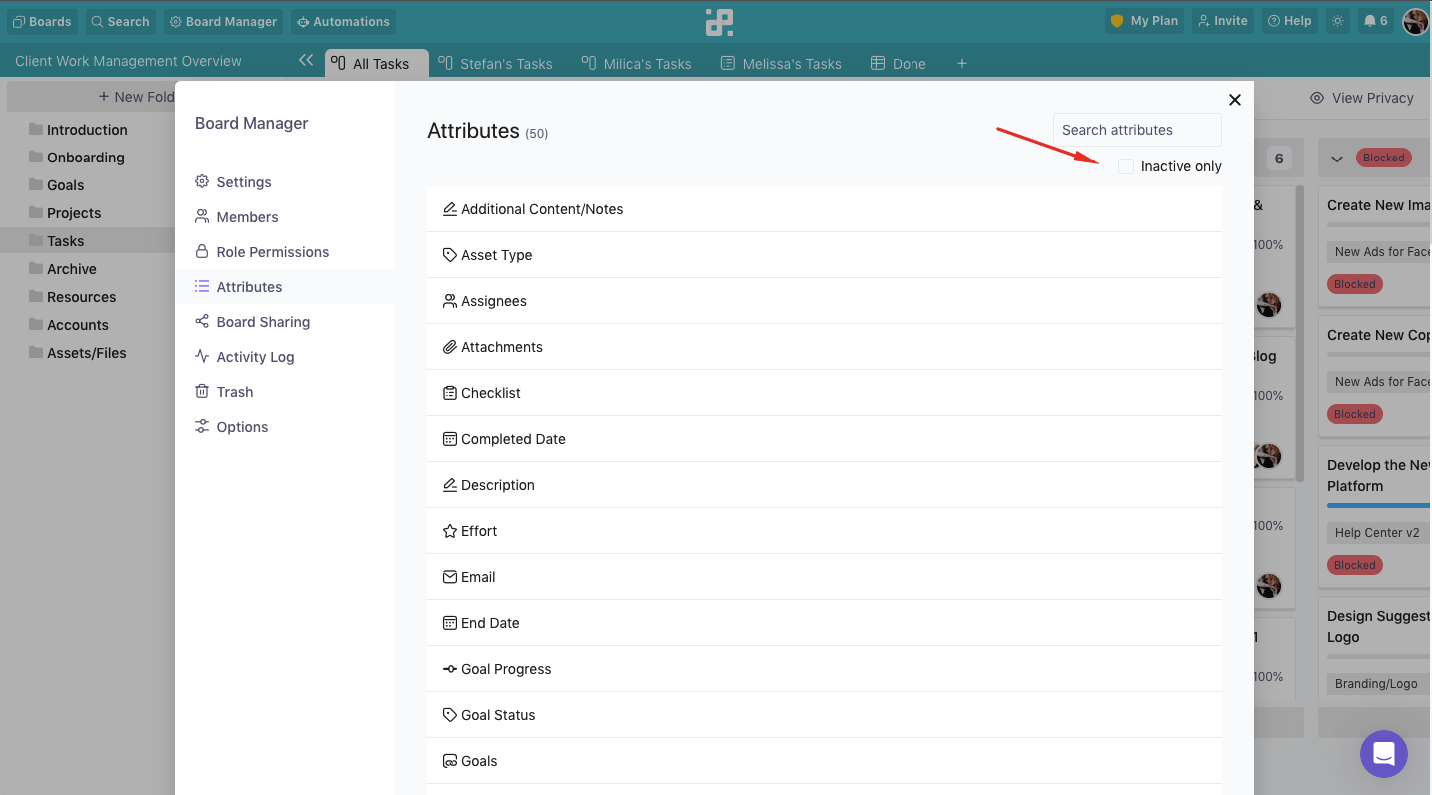
The Attributes section will allow you to edit and delete all the attributes you have in your board. You'll also be able to see inactive attributes only, by ticking the option above the list.
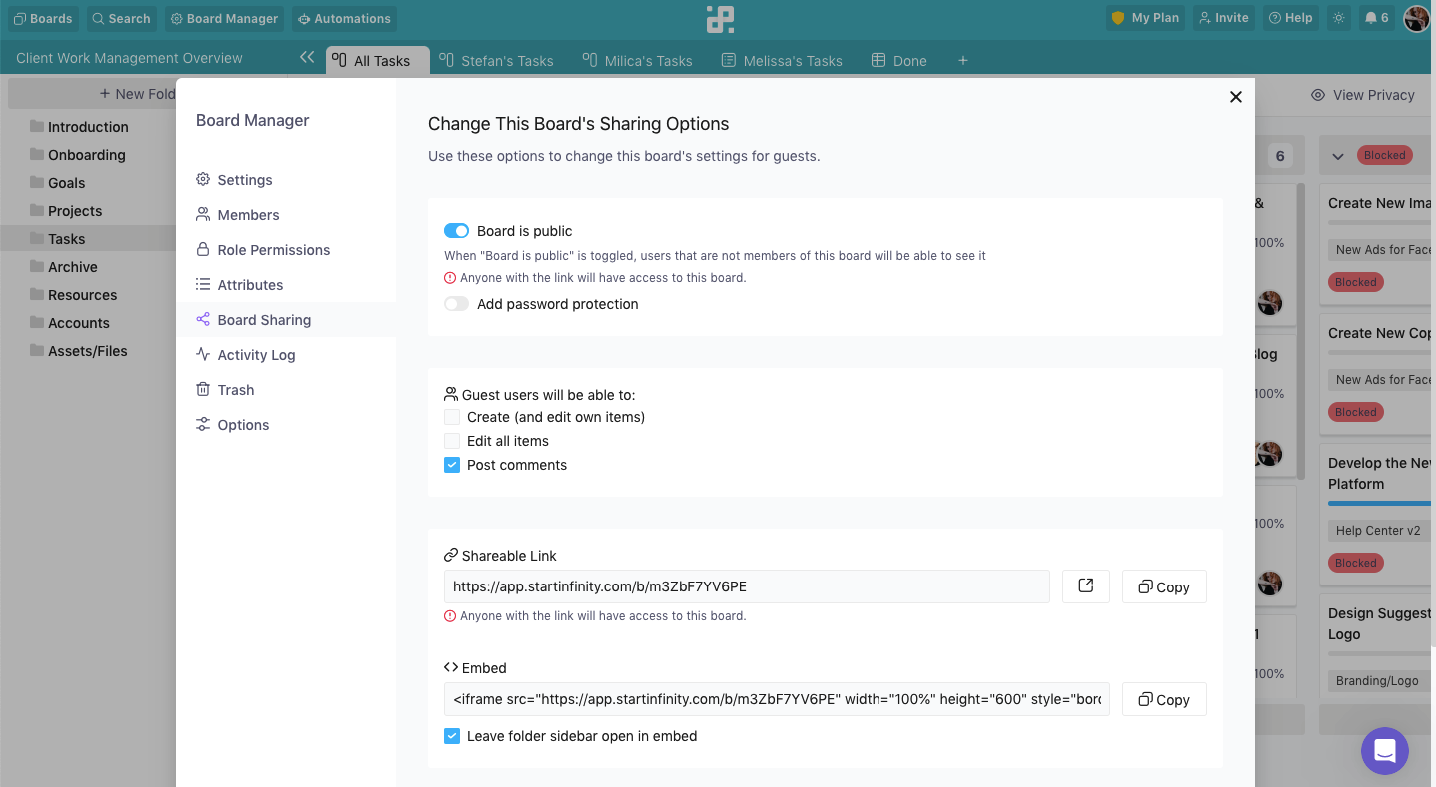
By clicking on Board Sharing, you’ll open a section where you’ll be able to decide if you want to share your board with guest collaborators, what you want them to be able to do, and how you want to share your board (via a link or embed code).
In the Activity Log section, you’ll be able to track all the changes made to the board, either by you or your team members. You can also filter the activity by members or folders.
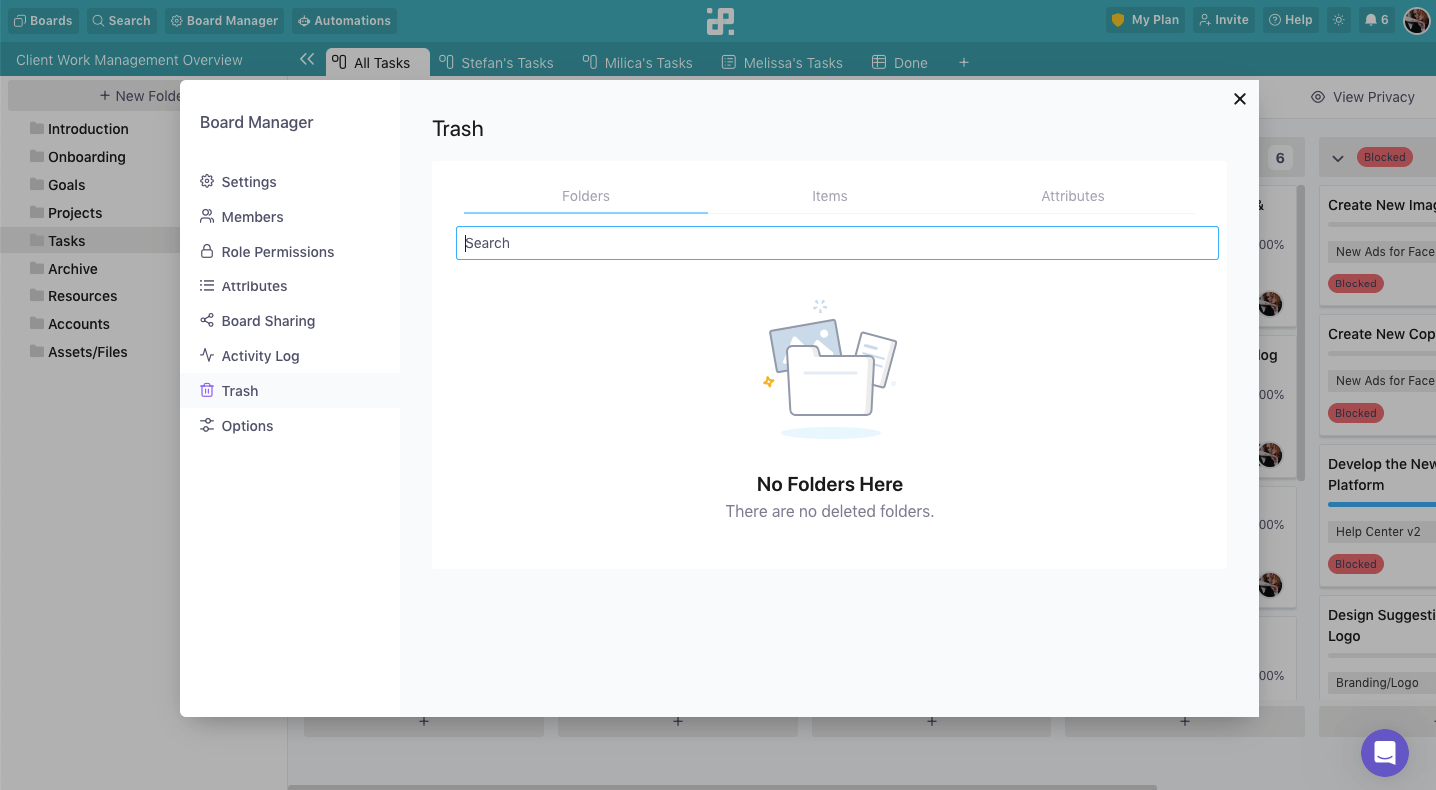
The Trash section will let you see all the folders, items, and attributes you deleted from your board in one place. This is also where you’ll be able to restore deleted data back to your board.
Finally, the Options section will let you export a board in CSV format, and delete it—if you need to.
Moving Boards to Another Workspce
In order to move boards between different workspaces in Infinity, you need to be the owner of both the workspace the board is currently in and the one you want to move it to.
If you're not the owner of the workspace, then the only way to move a certain board is to transfer ownership to the person who owns the account.
Moving boards is fairly easy, however: you just need to drag and drop a board from one workspace to another, or select the option 'Move Board' from the board settings.