-
Automations
-
Integrations
-
Import & Export
-
Privacy and Security
-
Infinity Partner Programs
-
Announcements
Date
If you are working with time-sensitive items, then adding a date to them will really come in handy to you.
You can use the Date attribute for anything from deadlines and events, to calls and meetings with clients.
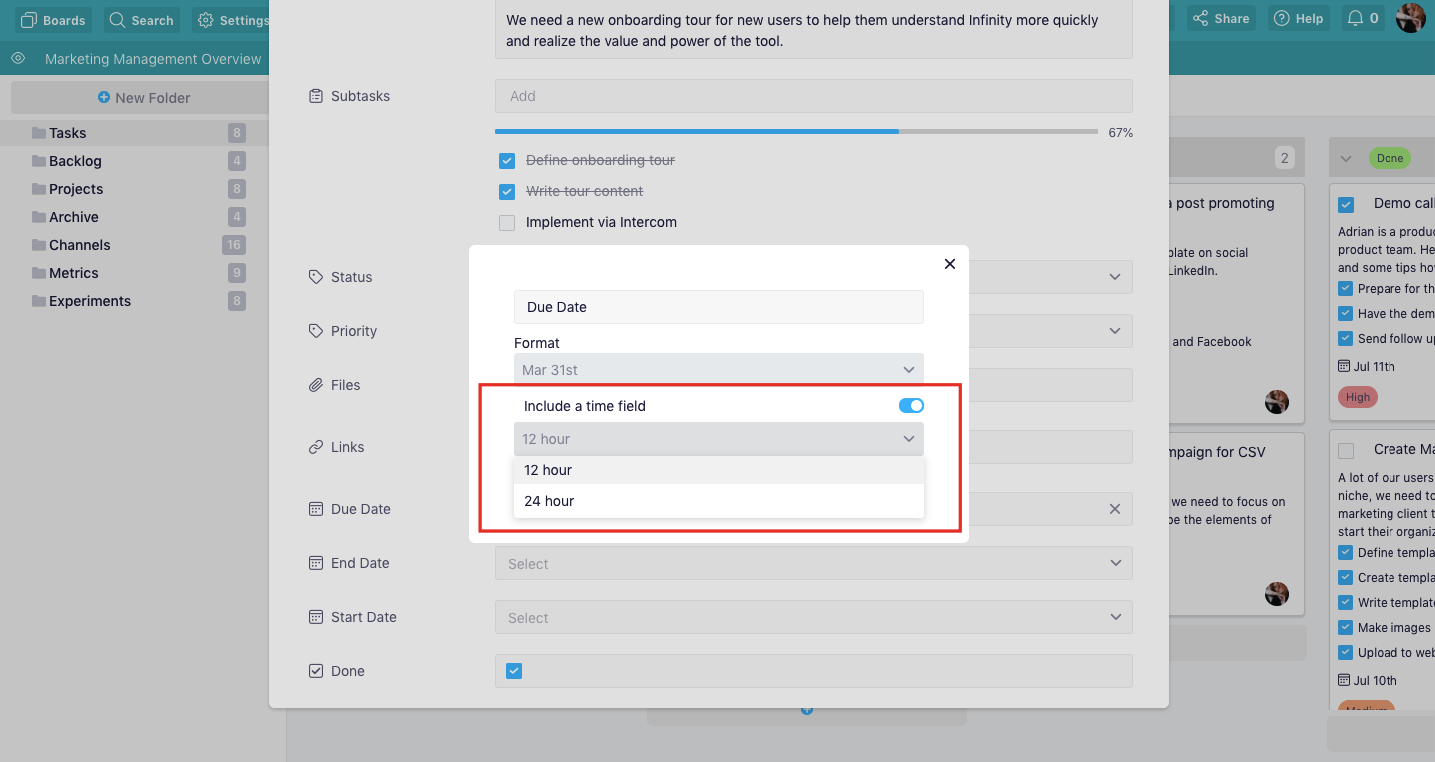
When creating this attribute, you will need to specify a date format. You can choose between five different options.

Keep in mind that you can change the date format anytime you like.
In this same pop-up, you will be able to choose if you want to add a time field to your date or not. You can pick between a 12-hour and 24-hour option.

You can have a time field for one Date attribute, but not for another one. It's up to you.
After you’re done, you will get to customize your Date attribute in your item by choosing the exact date from a calendar that appears when you click on the Date field. If you add a time field, this is where you’ll be able to edit the time, as well.
Depending on the view you are using, the Date attribute will appear differently.
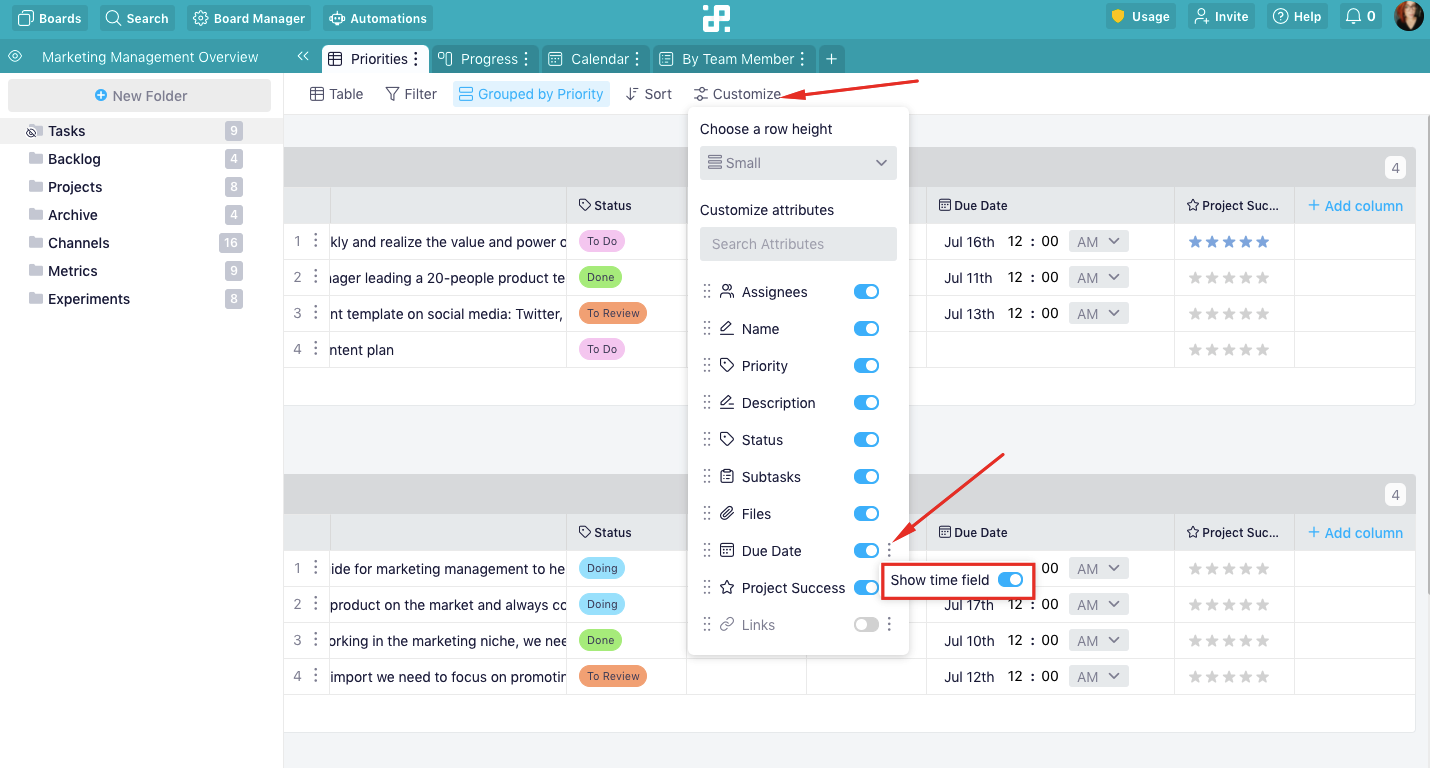
{primary} NOTE: If you're using the Table view in your board, you can easily hide the time from your Date attribute. Simply click on the Customize button and then on the three dots next to the Date attribute. Toggle 'Show Time Field' off.

In the Table view, it will be a separate column, in the Calendar you won't see it because items will actually be sorted into appropriate date fields, and in the Columns view you'll see them in the lower part of the ticket.